写给iOS小白的MVVM教程(一): 从MVC到MVVM之一个典型的MVC应用场景
前言
本着实践为主的原则, 此系列文章不做过多的概念性的阐述和讨论; 更多的代码和篇幅用来展示 MVC 和 MVVC 下的基础代码结构与具体实现, 来展示各自优劣. 这篇文章, 更多的在于发掘 MVC 与 MVVC 的共性, 以期为那些对 MVVC 感兴趣的 iOS 开发者, 找到一种平滑的过渡与重构代码的方式. 如果对 MVVC 感兴趣, 可以直接将本文的大部分代码引用到自己的项目中, 毕竟代码是写出来的! 开篇之前, 你可以先到这里下载本文的示例工程:
在这一篇章里, 我会分别使用我所理解的 MVC 与 MVVC 两种模式来完成同一个应用场景, 以期帮助那些熟悉传统 MVC 模式代码的 iOS 攻城狮, 能更好理解 MVVC. 限于篇幅, 将 MVC 和 MVVM 拆分为两个部分, 今天要说的是一个典型的 MVC 的应用场景, 为基于 MVC 的 MVVM 重构做个基础. 这篇文章着重进行了接口准备, 必须的知识点的说明等内容.
预设场景: 按分类请求一组博客, 点击获取博客详情
我们选取最常见的一组场景: 根据某种规则获取一组数据, 点击某一条数据, 可以跳转到下一界面获取数据详情. 这里我会根据分类请求此分类下的博客列表, 点击某一条信息, 可跳转到博客详情页. 简单说, 其实我们真正需要实现的只有两个页面: 博客分类列表页 与 博客详情页.
数据接口准备
我们至少需要两个接口, 一个可以根据分类来获取博客列表, 一个用来根据 id 获取博客详情.
使用预定义的接口
如果你没有自己的服务器或者对服务器开发不熟悉, 可以使用我准备的这两个测试接口:
博客列表接口
- http: //www.ios122.com/find_php/index.php?viewController=YFPostListViewController&model[category]=ui&model=2
分类名称, 目前预定义支持:- ui
,- ui
,- network
,- tool
四个分类.- autolayout
, 获取第几页的数据, 从 0 开始计数, 指请求此分类下第几页的数据. 预定义每个分类下有 100 条数据, 每 20 条数据一页.- 2
- 返回示例:
- [{
- "id": "ui_40",
- "title": "title_ui_40",
- "desc": "desc_ui_40"
- },
- {
- "id": "ui_41",
- "title": "title_ui_41",
- "desc": "desc_ui_41"
- },
- {
- "id": "ui_42",
- "title": "title_ui_42",
- "desc": "desc_ui_42"
- },
- {
- "id": "ui_43",
- "title": "title_ui_43",
- "desc": "desc_ui_43"
- },
- {
- "id": "ui_44",
- "title": "title_ui_44",
- "desc": "desc_ui_44"
- },
- {
- "id": "ui_45",
- "title": "title_ui_45",
- "desc": "desc_ui_45"
- },
- {
- "id": "ui_46",
- "title": "title_ui_46",
- "desc": "desc_ui_46"
- },
- {
- "id": "ui_47",
- "title": "title_ui_47",
- "desc": "desc_ui_47"
- },
- {
- "id": "ui_48",
- "title": "title_ui_48",
- "desc": "desc_ui_48"
- },
- {
- "id": "ui_49",
- "title": "title_ui_49",
- "desc": "desc_ui_49"
- },
- {
- "id": "ui_50",
- "title": "title_ui_50",
- "desc": "desc_ui_50"
- },
- {
- "id": "ui_51",
- "title": "title_ui_51",
- "desc": "desc_ui_51"
- },
- {
- "id": "ui_52",
- "title": "title_ui_52",
- "desc": "desc_ui_52"
- },
- {
- "id": "ui_53",
- "title": "title_ui_53",
- "desc": "desc_ui_53"
- },
- {
- "id": "ui_54",
- "title": "title_ui_54",
- "desc": "desc_ui_54"
- },
- {
- "id": "ui_55",
- "title": "title_ui_55",
- "desc": "desc_ui_55"
- },
- {
- "id": "ui_56",
- "title": "title_ui_56",
- "desc": "desc_ui_56"
- },
- {
- "id": "ui_57",
- "title": "title_ui_57",
- "desc": "desc_ui_57"
- },
- {
- "id": "ui_58",
- "title": "title_ui_58",
- "desc": "desc_ui_58"
- },
- {
- "id": "ui_59",
- "title": "title_ui_59",
- "desc": "desc_ui_59"
- }]
2. 博客详情接口
- http: //www.ios122.com/find_php/index.php?viewController=YFPostViewController&model[id]=ui_0
表示博客唯一标识. 其应为分类博客列表返回的一个有效 id.- ui_0
- 返回示例:
- {
- "title": "title of ui_0",
- "body": "<h2>Hello iOS122</h2> Scann To Join Us <br /> <image alt=\"qq\" src=\"https://raw.githubusercontent.com/ios122/ios122/master/1443002712802.png\" />"
- }
自定义接口
如果你有自己的服务器接口, 直接使用即可; 但是下面的 oc 代码, 你可能也要对应变换下; 如果你对服务器接口开发不是很了解, 可以先阅读下这篇文章: .
假定, 你已经阅读并领会了 <<iOS 程序猿如何快速掌握 PHP, 化身" 全栈攻城狮 "?>>, 这篇文章, 新建问及那, 并把下面的代码复制到对应文件中, 然后根据自己的需要更改即可:
博客列表接口源文件
- <?php // YFPostListViewController.php class YFPostListViewController {
- public $model=a rray(); //!< 传入的数据. private $countOfPerPage=2 0; //!< 每页数据条数.
- /* 获取内容,用于输出显示. */ protected function getContent() { /* 预定义一组数据 */ $datasource=a
- rray(); $categorys=a rray( 'ui', 'network', 'tool', 'autolayout'); for
- ($i=0; $i < count($categorys); $i++) { $categoryName=$ categorys[$i]; $categoryData=a
- rray(); for ($j=0; $j < 100; $j++) { $item=a rray( 'id'=>
- "{$categoryName}_{$j}", 'title' => "title_{$categoryName}_{$j}", 'desc'
- => "desc_{$categoryName}_{$j}" ); $categoryData[$j] = $item; } $datasource[$categoryName]
- = $categoryData; } $queryCategoryName = $this->model['category']; $queryPage
- = $this->model['page']; $targetCategoryData = $datasource[$queryCategoryName];
- $content = array(); for ($i = $this->countOfPerPage * $queryPage ; $i
- < $this->
- countOfPerPage * ($queryPage + 1); $i ++ ) { $content[] = $targetCategoryData[$i];
- } $content = json_encode($content); return $content; } public function
- show() { $content = $this->getContent(); header("Content-type: application/json");
- echo $content; } }
博客详情接口源文件
- <?php // YFPostViewController.php class YFPostViewController { public
- $model=a rray(); //!< 传入的数据. /* 获取内容,用于输出显示. */ protected function getContent()
- { $id=$ this->
- model['id']; $content = array( 'title' => "title of {$id}", 'body' =>
- '
- <h2>
- Hello iOS122
- </h2>
- Scann To Join Us
- <br />
- <image alt="qq" src="https://raw.githubusercontent.com/ios122/ios122/master/1443002712802.png"
- />
- ' ); $content = json_encode($content); return $content; } public function
- show() { $content = $this->getContent(); header("Content-type: application/json");
- echo $content; } }
MVC 版本实现: 类似的代码, 你不知道敲过了多少遍
技术要点
下面列出将要用到的技术点, 如有你不熟悉的, 可点击对应链接访问:
- 使用来处理网络请求;
- 使用实现 JSON 到数据模型的自动转换;
- 使用实现下拉刷新与上拉加载更多的效果;
- 使用进行 AutoLayout 布局;
- 使用优化页面加载时的进度提示;
思路分析
- 博客分类列表页面:
- 在前一页面指定博客分类;
- 页面加载时自动发起网络请求获取对应分类的数据;
- 获取数据成功后, 自动刷新视图; 获取失败, 则给出错误提示;
- 点击某一条数据, 可跳转到博客详情页.
- 博客详情页面:
- 在前一页面指定博客 id;
- 页面加载时自动发起网络请求获取 id 的博客详情;
- 获取成功后, 自动刷新视图; 获取失败, 则给出错误提示.
博客列表页面
1. 在前一页面指定博客分类;
这一步, 大家肯定都会:
- YFMVCPostListViewController * mvcPostListVC = [[YFMVCPostListViewController alloc] init];
- mvcPostListVC.categoryName = @"ui"; [self.navigationController pushViewController: mvcPostListVC animated: YES];
2. 页面加载时自动发起网络请求获取对应分类的数据;
为了保证每次都能进入列表页, 都能自动刷新数据, 建议在
方法刷新数据:
- viewWillAppear:
- - (void) viewWillAppear: (BOOL) animated { [super viewWillAppear: animated]; [self updateData];
- }
方法进行数据的更新:
- updateData
- - (void) updateData {
- AFHTTPRequestOperationManager * manager = [AFHTTPRequestOperationManager manager];
- NSString * urlStr = [NSString stringWithFormat: @"http://www.ios122.com/find_php/index.php?viewController=YFPostListViewController&model[category]=%@&model=0", self.categoryName]; [manager GET: urlStr parameters: nil success: ^(AFHTTPRequestOperation * operation, id responseObject) {
- NSLog(@"JSON: %@", responseObject);
- }
- failure: ^(AFHTTPRequestOperation * operation, NSError * error) {
- NSLog(@"Error: %@", error);
- }];
- }
此处使用的是预定义接口, 数据请求成功后, 控制台输入如下:
- JSON: ({
- desc = "desc_ui_0";
- id = "ui_0";
- title = "title_ui_0";
- },
- {
- desc = "desc_ui_1";
- id = "ui_1";
- title = "title_ui_1";
- },
- {
- desc = "desc_ui_2";
- id = "ui_2";
- title = "title_ui_2";
- },
- {
- desc = "desc_ui_3";
- id = "ui_3";
- title = "title_ui_3";
- },
- {
- desc = "desc_ui_4";
- id = "ui_4";
- title = "title_ui_4";
- },
- {
- desc = "desc_ui_5";
- id = "ui_5";
- title = "title_ui_5";
- },
- {
- desc = "desc_ui_6";
- id = "ui_6";
- title = "title_ui_6";
- },
- {
- desc = "desc_ui_7";
- id = "ui_7";
- title = "title_ui_7";
- },
- {
- desc = "desc_ui_8";
- id = "ui_8";
- title = "title_ui_8";
- },
- {
- desc = "desc_ui_9";
- id = "ui_9";
- title = "title_ui_9";
- },
- {
- desc = "desc_ui_10";
- id = "ui_10";
- title = "title_ui_10";
- },
- {
- desc = "desc_ui_11";
- id = "ui_11";
- title = "title_ui_11";
- },
- {
- desc = "desc_ui_12";
- id = "ui_12";
- title = "title_ui_12";
- },
- {
- desc = "desc_ui_13";
- id = "ui_13";
- title = "title_ui_13";
- },
- {
- desc = "desc_ui_14";
- id = "ui_14";
- title = "title_ui_14";
- },
- {
- desc = "desc_ui_15";
- id = "ui_15";
- title = "title_ui_15";
- },
- {
- desc = "desc_ui_16";
- id = "ui_16";
- title = "title_ui_16";
- },
- {
- desc = "desc_ui_17";
- id = "ui_17";
- title = "title_ui_17";
- },
- {
- desc = "desc_ui_18";
- id = "ui_18";
- title = "title_ui_18";
- },
- {
- desc = "desc_ui_19";
- id = "ui_19";
- title = "title_ui_19";
- })
3. 获取数据成功后, 自动刷新视图; 获取失败, 则给出错误提示;
这一部分, 涉及的变动较多, 我就直接贴代码了. 你会注意到 View 和数据已经交叉进行了, 很乱的感觉. 而这也是我们想要使用 MVVM 重构代码的重要原因之一.
- //
- // YFMVCPostListViewController.m
- // iOS122
- //
- // Created by 颜风 on 15/10/14.
- // Copyright (c) 2015年 iOS122. All rights reserved.
- //
- #import "YFMVCPostListViewController.h"#import "YFArticleModel.h"#import#import < MJRefresh.h > #import < MBProgressHUD.h > @interface YFMVCPostListViewController() < UITableViewDelegate,
- UITableViewDataSource > @property(nonatomic, strong) UITableView * tableView;@property(nonatomic, strong) NSMutableArray * articles; //!< 文章数组,内部存储AFArticleModel类型.
- @property(assign, nonatomic) NSInteger page; //!< 数据页数.表示下次请求第几页的数据.
- @end@implementation YFMVCPostListViewController - (void) viewDidLoad { [super viewDidLoad];
- // Do any additional setup after loading the view.
- } - (NSMutableArray * ) articles {
- if (nil == _articles) {
- _articles = [NSMutableArray arrayWithCapacity: 42];
- }
- return _articles;
- } - (void) didReceiveMemoryWarning { [super didReceiveMemoryWarning];
- // Dispose of any resources that can be recreated.
- } - (void) viewWillAppear: (BOOL) animated { [super viewWillAppear: animated];
- // 马上进入刷新状态
- [self.tableView.header beginRefreshing];
- } - (UITableView * ) tableView {
- if (nil == _tableView) {
- _tableView = [[UITableView alloc] init]; [self.view addSubview: _tableView]; [_tableView makeConstraints: ^(MASConstraintMaker * make) {
- make.edges.equalTo(UIEdgeInsetsMake(0, 0, 0, 0));
- }];
- _tableView.delegate = self;
- _tableView.dataSource = self;
- NSString * cellReuseIdentifier = NSStringFromClass([UITableViewCell class]); [_tableView registerClass: NSClassFromString(cellReuseIdentifier) forCellReuseIdentifier: cellReuseIdentifier];
- _tableView.header = [MJRefreshNormalHeader headerWithRefreshingBlock: ^{
- self.page = 0; [self updateData];
- }];
- _tableView.footer = [MJRefreshBackNormalFooter footerWithRefreshingBlock: ^{ [self updateData];
- }];
- }
- return _tableView;
- }
- /**
- * 更新视图.
- */
- - (void) updateView { [self.tableView reloadData];
- }
- /**
- * 更新数据.
- *
- * 数据更新后,会自动更新视图.
- */
- - (void) updateData {
- AFHTTPRequestOperationManager * manager = [AFHTTPRequestOperationManager manager];
- NSString * urlStr = [NSString stringWithFormat: @"http://www.ios122.com/find_php/index.php?viewController=YFPostListViewController&model[category]=%@&model=%ld", self.categoryName, (long) self.page++]; [manager GET: urlStr parameters: nil success: ^(AFHTTPRequestOperation * operation, id responseObject) { [self.tableView.header endRefreshing]; [self.tableView.footer endRefreshing];
- if (1 == self.page) { // 说明是在重新请求数据.
- self.articles = nil;
- }
- NSArray * responseArticles = [YFArticleModel objectArrayWithKeyValuesArray: responseObject]; [self.articles addObjectsFromArray: responseArticles]; [self updateView];
- }
- failure: ^(AFHTTPRequestOperation * operation, NSError * error) { [self.tableView.header endRefreshing]; [self.tableView.footer endRefreshing];
- MBProgressHUD * hud = [MBProgressHUD showHUDAddedTo: self.view animated: YES];
- hud.mode = MBProgressHUDModeText;
- hud.labelText = @"您的网络不给力!"; [hud hide: YES afterDelay: 2];
- }];
- }#pragma mark - tabelView代理方法. - (NSInteger) tableView: (UITableView * ) tableView numberOfRowsInSection: (NSInteger) section {
- NSInteger number = self.articles.count;
- return number;
- } - (UITableViewCell * ) tableView: (UITableView * ) tableView cellForRowAtIndexPath: (NSIndexPath * ) indexPath {
- NSString * cellReuseIdentifier = NSStringFromClass([UITableViewCell class]);
- UITableViewCell * cell = [tableView dequeueReusableCellWithIdentifier: cellReuseIdentifier forIndexPath: indexPath];
- YFArticleModel * model = self.articles[indexPath.row];
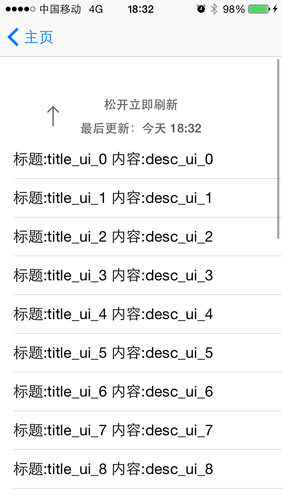
- NSString * content = [NSString stringWithFormat: @"标题:%@ 内容:%@", model.title, model.desc];
- cell.textLabel.text = content;
- return cell;
- }@end
4. 点击某一条数据, 可跳转到博客详情页.
只需要再额外实现下
方法即可:
- -tableView: didSelectRowAtIndexPath:
- - (void) tableView: (UITableView * ) tableView didSelectRowAtIndexPath: (NSIndexPath * ) indexPath {
- // 跳转到博客详情.
- YFArticleModel * articleModel = self.articles[indexPath.row];
- YFMVCPostViewController * postVC = [[YFMVCPostViewController alloc] init];
- postVC.articleID = articleModel.id; [self.navigationController pushViewController: postVC animated: YES];
- }
博客详情页面

1. 在前一页面指定博客 id;
这里其实就是博客列表的控制器的那几句:
- // 跳转到博客详情.
- YFArticleModel * articleModel = self.articles[indexPath.row];
- YFMVCPostViewController * postVC = [[YFMVCPostViewController alloc] init];
- postVC.articleID = articleModel.id; [self.navigationController pushViewController: postVC animated: YES];
2. 页面加载时自动发起网络请求获取 id 的博客详情;
此处为了方便, 我们依然使用预定义的博客详情接口:
- AFHTTPRequestOperationManager * manager = [AFHTTPRequestOperationManager manager];
- NSString * urlStr = [NSString stringWithFormat: @"http://www.ios122.com/find_php/index.php?viewController=YFPostViewController&model[id]=%@", self.articleID]; [manager GET: urlStr parameters: nil success: ^(AFHTTPRequestOperation * operation, id responseObject) {
- NSLog(@"%@", responseObject); [self updateView];
- }
- failure: ^(AFHTTPRequestOperation * operation, NSError * error) {
- MBProgressHUD * hud = [MBProgressHUD showHUDAddedTo: self.view animated: YES];
- hud.mode = MBProgressHUDModeText;
- hud.labelText = @"您的网络不给力!"; [hud hide: YES afterDelay: 2];
- }];
请求的输入, Xcode 控制台打印输出, 类似于:
- {
- body = "<h2>Hello iOS122</h2> Scann To Join Us <br /> <image alt=\"qq\" src=\"https://raw.githubusercontent.com/ios122/ios122/master/1443002712802.png\" />";
- title = "title of ui_0";
- }
3. 获取成功后, 自动刷新视图; 获取失败, 则给出错误提示.
你会注意到, 我们在上一步获取的数据, body 部分内部是 HTML 字符串, 所以我们要使用 webView 来显示博客详情. 这和最近炒得很火的的混合开发模式有些像, 但是目前主流的博客应用, 几乎都是这么做的. 完整代码如下:
- //
- // YFMVCPostViewController.m
- // iOS122
- //
- // Created by 颜风 on 15/10/16.
- // Copyright (c) 2015年 iOS122. All rights reserved.
- //
- #import "YFMVCPostViewController.h"#import "YFArticleModel.h"#import#import < MBProgressHUD.h > @interface YFMVCPostViewController() < UIWebViewDelegate > @property(strong, nonatomic) UIWebView * webView;@property(strong, nonatomic) YFArticleModel * article;@end@implementation YFMVCPostViewController - (UIWebView * ) webView {
- if (nil == _webView) {
- _webView = [[UIWebView alloc] init]; [self.view addSubview: _webView]; [_webView makeConstraints: ^(MASConstraintMaker * make) {
- make.edges.equalTo(UIEdgeInsetsMake(64, 0, 0, 0));
- }];
- }
- return _webView;
- } - (void) viewDidLoad { [super viewDidLoad];
- // Do any additional setup after loading the view.
- } - (void) didReceiveMemoryWarning { [super didReceiveMemoryWarning];
- // Dispose of any resources that can be recreated.
- } - (void) viewWillAppear: (BOOL) animated { [super viewWillAppear: animated]; [self updateData];
- }
- /**
- * 更新视图.
- */
- - (void) updateView { [self.webView loadHTMLString: self.article.body baseURL: nil];
- }
- /**
- * 更新数据.
- *
- * 数据更新后,会自动更新视图.
- */
- - (void) updateData { [MBProgressHUD showHUDAddedTo: self.view animated: YES];
- AFHTTPRequestOperationManager * manager = [AFHTTPRequestOperationManager manager];
- NSString * urlStr = [NSString stringWithFormat: @"http://www.ios122.com/find_php/index.php?viewController=YFPostViewController&model[id]=%@", self.articleID]; [manager GET: urlStr parameters: nil success: ^(AFHTTPRequestOperation * operation, id responseObject) {
- self.article = [YFArticleModel objectWithKeyValues: responseObject]; [self updateView];
- }
- failure: ^(AFHTTPRequestOperation * operation, NSError * error) {
- MBProgressHUD * hud = [MBProgressHUD showHUDAddedTo: self.view animated: YES];
- hud.mode = MBProgressHUDModeText;
- hud.labelText = @"您的网络不给力!"; [hud hide: YES afterDelay: 2];
- }];
- }@end
小结
此篇主要展示了一个典型的列表–> 详情场景的 MVC 实现, 相关技术代码可以直接用于自己的项目中. 尽管这是简化的场景, 但依然可以很明显地看出来数据, 网络请求与视图间的相互调用, 使代码整体的可复用性大大降低! 而这, 也是我们下次要用 MVVC 重构这个示例的核心目的之一!
来源: http://lib.csdn.net/article/ios/42147